While it's still cold out here I thought I'd take advantage of the weather and use the oven to warm the house. I don't honestly think I've ever made a savory pie and had a craving for hearty, homemade food.
Beef, Onion and Red Wine pie. Ok, I cheated and used 'Alcohol Removed' red wine. I know when cooking there's no need to, but I couldn't be bothered dealing with the look I'd get, as a pregnant woman, buying wine from the only bottle-o in town. Even if I explained it was for cooking. Then I'd get the 'yeah, right' look. When I saw the bottle in IGA - problem solved!
For a pie, it's quite quick. Cooking beef, onion, garlic then adding stock, thyme, a bay leaf, wine and water. Season and let simmer. I love those 'walk away and forget about till the timer goes off' type recipes. Easy peasy.
While the mixture cooled I defrosted some shortcrust and puff pastry that everyone keeps in the freezer. I lined my newly bought pie tin (I had somehow managed to keep from Noah as he LOVES to play with everything in my kitchen) with shortcrust. Poured in my now warm beef mixture then topped with puff, pressing the pastries together. A good brush with some beaten egg and into the oven for another 'set and forget' timeslot.
The result:
A very yummy dinner! Another to be tagged and made again!
Sunday, August 14, 2011
Friday, July 15, 2011
Lemon and Garlic Chicken
As it's getting colder it's nice to cook a whole roast and warm the house up with the heat of the oven. As we've all been sick lately I wanted something with lots of healthy garlic and was glad to find a whole roast chicken recipe.
But, this chicken is cooked in stock and wine on the stove top, not in the oven. But, oh well. It'll still taste great.
After stuffing it with fresh lemon, I rubbed the skin with some oil and seasonings. I browned some eschalots and garlic in the bottom of my cast iron pan then removed them and dropped in the chicken, breast down so the skin would start to crisp up. But, I didn't put enough oil in the bottom and all that happened was the skin sticking to the bottom of the pan.
Bugger.
After 5 minutes I turned it, pouring more oil in and browned the bottom of the chook. Another 5 min later and I re-added the garlic and eschalots with some stock and Riesling. Wait, no, I didn't have any Riesling, so I used a wine I have sitting on the bench waiting for me to be not-pregnant so I could drink it. I did the next best thing and cooked with it instead.
Now, the recipe states to simmer it covered for 30 min, then for another 30 min uncovered. I did this, but found that I was always basting the chicken in the stock and wine as I was scared the breast would dry out being out of the liquid. I suppose if the skin hadn't burnt off I wouldn't have worried about it as much, but I did this every 5 minutes.
Pulling the chicken out at the end the beautiful aroma of lemon greets me. I carve it up and we ate it with some polenta and my home grown cherry tomatoes. I loved the subtle hint of lemon through the chicken meat. I squeezed the cooked garlic out of their skins and stirred it through my polenta. Great!
While it didn't cure our colds, it filled our hungry tummies!
But, this chicken is cooked in stock and wine on the stove top, not in the oven. But, oh well. It'll still taste great.
After stuffing it with fresh lemon, I rubbed the skin with some oil and seasonings. I browned some eschalots and garlic in the bottom of my cast iron pan then removed them and dropped in the chicken, breast down so the skin would start to crisp up. But, I didn't put enough oil in the bottom and all that happened was the skin sticking to the bottom of the pan.
Bugger.
After 5 minutes I turned it, pouring more oil in and browned the bottom of the chook. Another 5 min later and I re-added the garlic and eschalots with some stock and Riesling. Wait, no, I didn't have any Riesling, so I used a wine I have sitting on the bench waiting for me to be not-pregnant so I could drink it. I did the next best thing and cooked with it instead.
Now, the recipe states to simmer it covered for 30 min, then for another 30 min uncovered. I did this, but found that I was always basting the chicken in the stock and wine as I was scared the breast would dry out being out of the liquid. I suppose if the skin hadn't burnt off I wouldn't have worried about it as much, but I did this every 5 minutes.
Pulling the chicken out at the end the beautiful aroma of lemon greets me. I carve it up and we ate it with some polenta and my home grown cherry tomatoes. I loved the subtle hint of lemon through the chicken meat. I squeezed the cooked garlic out of their skins and stirred it through my polenta. Great!
While it didn't cure our colds, it filled our hungry tummies!
Friday, July 8, 2011
Creme Carmel
I don't think I've ever even eaten a Creme Caramel, let along made one. But I was looking for a dessert one week night and found I had all the ingredients, so I gave it a go.
It's actually pretty easy, a basic baked custard recipe as well as a caramel. Creme Caramel.....bit self-explanatory really....
Custard is something I make a lot as my son Noah loves it and it's a nice way to fill his tummy at the end of the night. I usually use only milk, but this recipe included cream to make it a bit richer. The only difference is the custard I make includes cornflour to thicken it and this one doesn't, but I suppose the cream did that job. Adding an extra egg yolk so it sets well when baking, I set the made custard aside while I made the caramel.
I've only made caramel a handful of times in my life, so it's something I'm still new at. Boil sugar and water till it's golden using a brush in water to brush down any crystals that form on the sides. Check. BE CAREFUL. Boiling sugar syrup is not a nice thing to get on your fingers.
When I removed the caramel from the heat I poured it directly into the ramekins. The recipe says to let it sit for a few moments to allow the syrup to begin to set. I think this is where I went wrong. I did let it sit for the allocated 5 minutes, but when I turned them out after cooking a lot of the caramel was stuck hard in the bottom of the ramekin. Even after dipping it into hot water to loosen it up a bit. Next time I won't leave it for so long before pouring the custard in.
Bake in a bain-marie. Check.
My oven is stupid and I had to bake for an extra 5 minutes.
Refrigerate till cold. Check.
As I mentioned, they didn't turn out easily, but a lot of caramel still came out with them, so it wasn't a huge loss. I really liked them, finding the custard quite smooth and delicate. I liked that the rich caramel didn't take over the custard either.
Hubby thought they were too rich but he thinks anything with flavor is too rich. Next time I make it I'll make a single serve. Might be tonight....
It's actually pretty easy, a basic baked custard recipe as well as a caramel. Creme Caramel.....bit self-explanatory really....
Custard is something I make a lot as my son Noah loves it and it's a nice way to fill his tummy at the end of the night. I usually use only milk, but this recipe included cream to make it a bit richer. The only difference is the custard I make includes cornflour to thicken it and this one doesn't, but I suppose the cream did that job. Adding an extra egg yolk so it sets well when baking, I set the made custard aside while I made the caramel.
I've only made caramel a handful of times in my life, so it's something I'm still new at. Boil sugar and water till it's golden using a brush in water to brush down any crystals that form on the sides. Check. BE CAREFUL. Boiling sugar syrup is not a nice thing to get on your fingers.
Bake in a bain-marie. Check.
My oven is stupid and I had to bake for an extra 5 minutes.
Refrigerate till cold. Check.
As I mentioned, they didn't turn out easily, but a lot of caramel still came out with them, so it wasn't a huge loss. I really liked them, finding the custard quite smooth and delicate. I liked that the rich caramel didn't take over the custard either.
Hubby thought they were too rich but he thinks anything with flavor is too rich. Next time I make it I'll make a single serve. Might be tonight....
Monday, June 20, 2011
Pizza!!!!!!
Just like everyone else, I too love pizza.
Home-made is always better.
We have a take-away night once a week and sometimes instead I'll make home-made pizza's instead of eating the greasy food from the only available take away in the town. Usually I'll use flat bread as a base and top it with all the things we like to eat, but I was excited to make a base from scratch and luckily the Seasons cookbook provides a great base recipe.
A big thing for me is working with yeast, which I haven't done since I was a teenager making pizza bases in my Mum's bread maker (they were always the BEST pizza bases!). I was nervous to try it without the safety of the bread maker, but there's only one way to learn new things hey?
So I activated the yeast by adding it to some water with some sugar to feed it and set it aside until it bubbled at me. Then I mixed it with the dry ingredients gently and set it aside to prove. Once it had doubled in size I cut it into quarters and set it aside again until it had doubled in size.
See? Not as hard as I thought! They were so soft it seemed a shame to flatten and roll them out, but it must be done for a good pizza!
First I made Hubby's pizza. A Meat + Meat + Meat pizza. Just the way he likes it.
Then a little ham and pineapple one for Noah. I must admit, I'm pretty sure I ate more of it than he did.
Then, I made a smaller one with the garlic topping recipe in Seasons. Definitely more garlic next time. I could probably eat it straight from the bulb I love it that much. It was very simple: garlic, cheese and olive oil. Definitely don't forget the olive oil or it's a bit dry.
Then my favorite. Pizza Margherita. The first thing that strikes me about this recipe is that there is no sauce for a base. The tomatoes are squeezed to extract the juice (so it doesn't go soggy) and then lovingly placed on the pizza along side some mozzarella, basil and olive oil. When baked the cheese forms the missing sauce base, but I still found the end result a bit dry. In my opinion, anyway. Next time I'll make a basic tomato sauce base, but still keep the rest of the ingredients the same. Less cheese so my ass doesn't get so big.
A crack of salt when done baking makes the world of difference. DON'T FORGET IT!
While different to the usual take away version of the Margherita, it was still a great pizza to eat and full of flavor.
Home-made is always better.
We have a take-away night once a week and sometimes instead I'll make home-made pizza's instead of eating the greasy food from the only available take away in the town. Usually I'll use flat bread as a base and top it with all the things we like to eat, but I was excited to make a base from scratch and luckily the Seasons cookbook provides a great base recipe.
A big thing for me is working with yeast, which I haven't done since I was a teenager making pizza bases in my Mum's bread maker (they were always the BEST pizza bases!). I was nervous to try it without the safety of the bread maker, but there's only one way to learn new things hey?
So I activated the yeast by adding it to some water with some sugar to feed it and set it aside until it bubbled at me. Then I mixed it with the dry ingredients gently and set it aside to prove. Once it had doubled in size I cut it into quarters and set it aside again until it had doubled in size.
See? Not as hard as I thought! They were so soft it seemed a shame to flatten and roll them out, but it must be done for a good pizza!
Then a little ham and pineapple one for Noah. I must admit, I'm pretty sure I ate more of it than he did.
Then, I made a smaller one with the garlic topping recipe in Seasons. Definitely more garlic next time. I could probably eat it straight from the bulb I love it that much. It was very simple: garlic, cheese and olive oil. Definitely don't forget the olive oil or it's a bit dry.
A crack of salt when done baking makes the world of difference. DON'T FORGET IT!
While different to the usual take away version of the Margherita, it was still a great pizza to eat and full of flavor.
Thursday, May 12, 2011
Roast Pumpkin and Garlic Soup
I grew up with my Dad's Pumpkin Soup and his Apple and Rhubarb stew. I will say that absolutely nothing beats Dad's pumpkin soup....mainly because I'm not the one cooking!
When I was pregnant I routinely made myself roast pumpkin soup for my work lunch. I'd cook up a big batch on Sunday and eat it throughout the week. I made so much soup I got sick of it. I could not physically eat any more pumpkin soup.
My son is now 18 months old and as the weather cools Pumpkin soup seems more and more appealing. I realised the other day that I haven't had any since my pregnancy, so a warming lunch time soup and buttered toast will hit the spot.
The difference is the honey and cream. So. Much. Cream. Roasting the Pumpkin with honey really brought out the sweetness in the vegetable, but next time I'll definitely use less. (I didn't exactly measure.....) After blitzing it, you add some cream. Then more cream. Then sour cream.
So much cream. I suppose that gives it the....uh...creaminess. It's a very smooth soup and easy to enjoy. And freeze for lunch the next day.
More garlic and less honey and I'll be in heaven.
When I was pregnant I routinely made myself roast pumpkin soup for my work lunch. I'd cook up a big batch on Sunday and eat it throughout the week. I made so much soup I got sick of it. I could not physically eat any more pumpkin soup.
My son is now 18 months old and as the weather cools Pumpkin soup seems more and more appealing. I realised the other day that I haven't had any since my pregnancy, so a warming lunch time soup and buttered toast will hit the spot.
The difference is the honey and cream. So. Much. Cream. Roasting the Pumpkin with honey really brought out the sweetness in the vegetable, but next time I'll definitely use less. (I didn't exactly measure.....) After blitzing it, you add some cream. Then more cream. Then sour cream.
So much cream. I suppose that gives it the....uh...creaminess. It's a very smooth soup and easy to enjoy. And freeze for lunch the next day.
More garlic and less honey and I'll be in heaven.
Sunday, April 17, 2011
Cheat's Ricotta, Spinach and Mint Gnocchi
Please note: I've never made gnocchi before. Never. Ever. So when I found this 'Cheat's' version, I thought, 'Sweet! It'll be easy and taste great!' Yes, I've eaten gnocchi before. Beautiful. Soft. Not anything like what I made.
I think where I went wrong was overworking the flour in the mixture. I think it activated the gluten too much as the end result were so - er - glutenous, that I didn't like it very much at all. Don't get me wrong, it's not like I stood there mixing and rolling for ages, I was very aware not to, but still. Not a good result.
And my cream was off, so I made a quick butter and garlic sauce and tossed them in that, but they were ruined long before they got to that pan.
They formed well. I found the recipe needed a touch more flour than what it calls for or they wouldn't hold together at all. Not much, maybe a tablespoon? But without it, the gnocchi were falling apart and no way they would have survived boiling water. There were in long enough to come to the surface and I removed them when they started floating. Then tossed them in the butter and grated a bit of fresh Parmesan over the top.
But, as I facebooked, they tasted like dumplings without the Beef Stew. Very bland. Very glutenous. Not at all enjoyable for full meal. That's ok. I'm not going to like everything I make, that's for sure.
Isn't that the point to cooking? So I can improve technique, my taste and learn more.
Next time I will try cooking traditional gnocchi. With potatoes. And not cheating....
I think where I went wrong was overworking the flour in the mixture. I think it activated the gluten too much as the end result were so - er - glutenous, that I didn't like it very much at all. Don't get me wrong, it's not like I stood there mixing and rolling for ages, I was very aware not to, but still. Not a good result.
And my cream was off, so I made a quick butter and garlic sauce and tossed them in that, but they were ruined long before they got to that pan.
They formed well. I found the recipe needed a touch more flour than what it calls for or they wouldn't hold together at all. Not much, maybe a tablespoon? But without it, the gnocchi were falling apart and no way they would have survived boiling water. There were in long enough to come to the surface and I removed them when they started floating. Then tossed them in the butter and grated a bit of fresh Parmesan over the top.
But, as I facebooked, they tasted like dumplings without the Beef Stew. Very bland. Very glutenous. Not at all enjoyable for full meal. That's ok. I'm not going to like everything I make, that's for sure.
Isn't that the point to cooking? So I can improve technique, my taste and learn more.
Next time I will try cooking traditional gnocchi. With potatoes. And not cheating....
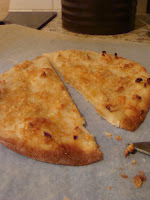
Coconut Bread and Quick Grapefruit Jam
I know it's been a while since I've posted, but I've still been cooking my little heart out!
A few weeks ago I made Donna's Coconut Bread and Grapefruit Jam and took them to my Mothers Group for critique (and so I didn't end up eating it all by myself)
I love the jam. I'll have you know, I've only made jam once before and it sucked. Majorly, sucked. I'm pretty sure I had too much water and not enough fruit and it turned to burnt toffee and took me days to clean off the bottom of the saucepan. So to say I was a bit apprehensive at trying jam again was an understatement.
I am lucky enough to have my own beautiful Grapefruit Tree in my backyard and right now it is abundant with fruit, which all end up rotting underneath it as I'm not a big grapefruit fan. I used my fresh fruit in this jam and am very happy with the results. I had to simmer it for much longer than the recipe and to get the right consistancy I pulsed it with my stick blender a few times. So it's more of a marmalade than a jam, but still yummy nonetheless. It's sweet at first but has the lovely bitterness of the grapefruit at the back of your pallate when you swallow, which evens out the initial sweetness. I'm so glad it worked and I wasn't cleaning my damn saucepan again for ages!!
Thankfully some of the wonderful ladies in my mothers group took some home!
The Coconut bread was really easy to make, except I didn't have any buttermilk, so I cheated and used regular milk. And there was a mountain of butter in it. Like, literally, a small mountain....
I was expecting it to be lighter than it was, but I suppose with 3 cups of flour, it wasn't going to be that light. It had a lovely mild coconut-y taste, so next time I might substitute the buttermilk for coconut milk and give it a stronger coconut flavour.
It went really well with the jam and, thankfully, was gobbled up quickly!
A few weeks ago I made Donna's Coconut Bread and Grapefruit Jam and took them to my Mothers Group for critique (and so I didn't end up eating it all by myself)
I love the jam. I'll have you know, I've only made jam once before and it sucked. Majorly, sucked. I'm pretty sure I had too much water and not enough fruit and it turned to burnt toffee and took me days to clean off the bottom of the saucepan. So to say I was a bit apprehensive at trying jam again was an understatement.
I am lucky enough to have my own beautiful Grapefruit Tree in my backyard and right now it is abundant with fruit, which all end up rotting underneath it as I'm not a big grapefruit fan. I used my fresh fruit in this jam and am very happy with the results. I had to simmer it for much longer than the recipe and to get the right consistancy I pulsed it with my stick blender a few times. So it's more of a marmalade than a jam, but still yummy nonetheless. It's sweet at first but has the lovely bitterness of the grapefruit at the back of your pallate when you swallow, which evens out the initial sweetness. I'm so glad it worked and I wasn't cleaning my damn saucepan again for ages!!
Thankfully some of the wonderful ladies in my mothers group took some home!
The Coconut bread was really easy to make, except I didn't have any buttermilk, so I cheated and used regular milk. And there was a mountain of butter in it. Like, literally, a small mountain....
I was expecting it to be lighter than it was, but I suppose with 3 cups of flour, it wasn't going to be that light. It had a lovely mild coconut-y taste, so next time I might substitute the buttermilk for coconut milk and give it a stronger coconut flavour.
It went really well with the jam and, thankfully, was gobbled up quickly!
Subscribe to:
Posts (Atom)
